>> TUTORIALS
>> Modelling Buildings (Part 1 / 3)
In this tutorial you will learn how to model real buildings using Google Earth, Google StreetView, GIMP and Blender.
I will show you how to create LOD models for a building and how to get all measurements correctly.
As an example I will use the building in San Francisco, Central Richmond, 332 15th Ave.1. Creating a silhouette of the building
First head to Google Earth and use the ruler tool in the taskbar to measure all that's necessary. Keep in mind to not get too hung up on lenghts and widths, it's more than enough to work in 10cm steps instead of 1cm...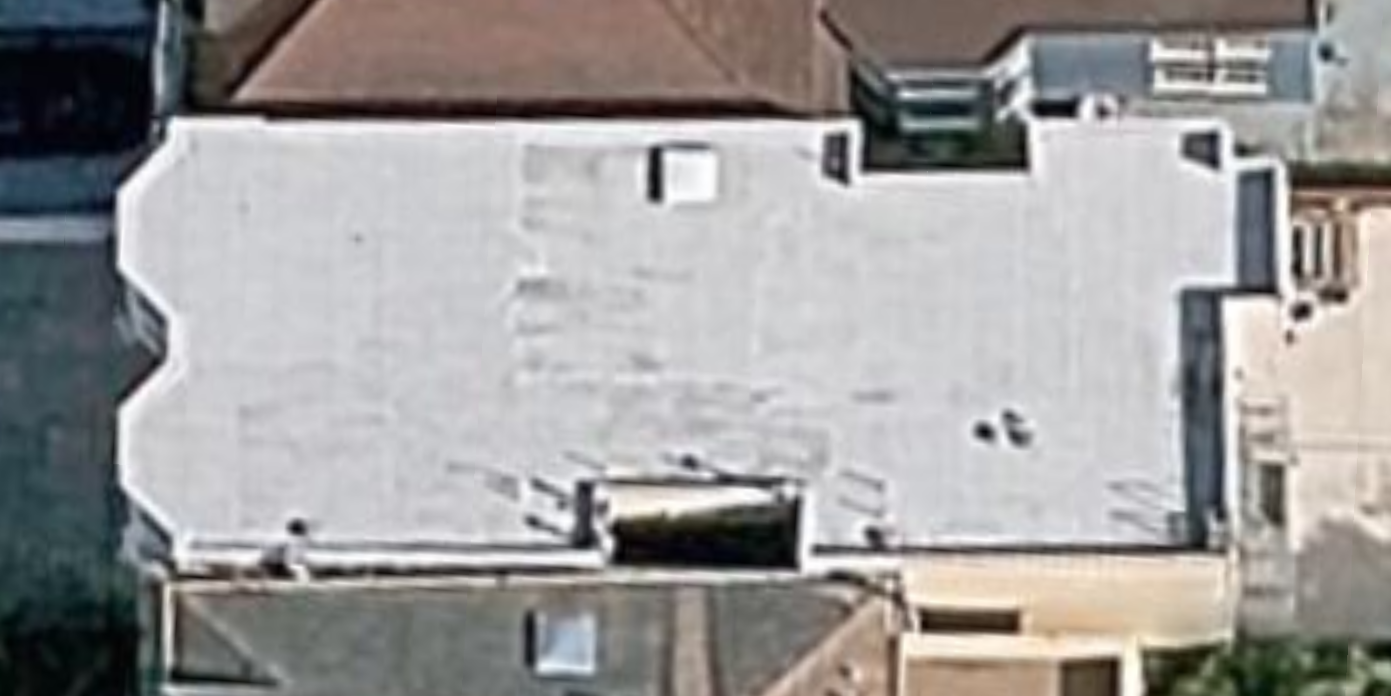
Open Blender, clear the file and add only a plane at location 0 0 0. If you moved your 3D cursor just reset it back to the original position (SHIFT + C).
Switch to "Edit"-Mode for said plane and recreate the building's silhouette in Blender with all the measurements you took.
Here's a small list of things you have to keep in mind while doing so:
- 1 unit in Blender equals 1 meter (in my models, you are free to choose another scale ;) ), keep that scale through the whole process, else your model will end up all messed up
- Starting at 0 0 0 and moving creation the model to the right and the bottom makes keeping up with lengths a lot easier
- Don't go into detail too much yet, you just want the general shape and the general walls correctly! Whatever details there are like ladders, lights, etc. can wait until later
- Turn on "Snap during Transform" to make your life a lot easier
- For buildings without flat roofs you might need to think twice where to take measurements. Google Earth's satellite view is not a map in the traditional sense, those are real images... Think before you measure and you'll be fine ;)
In the end, the result for my building looked like this: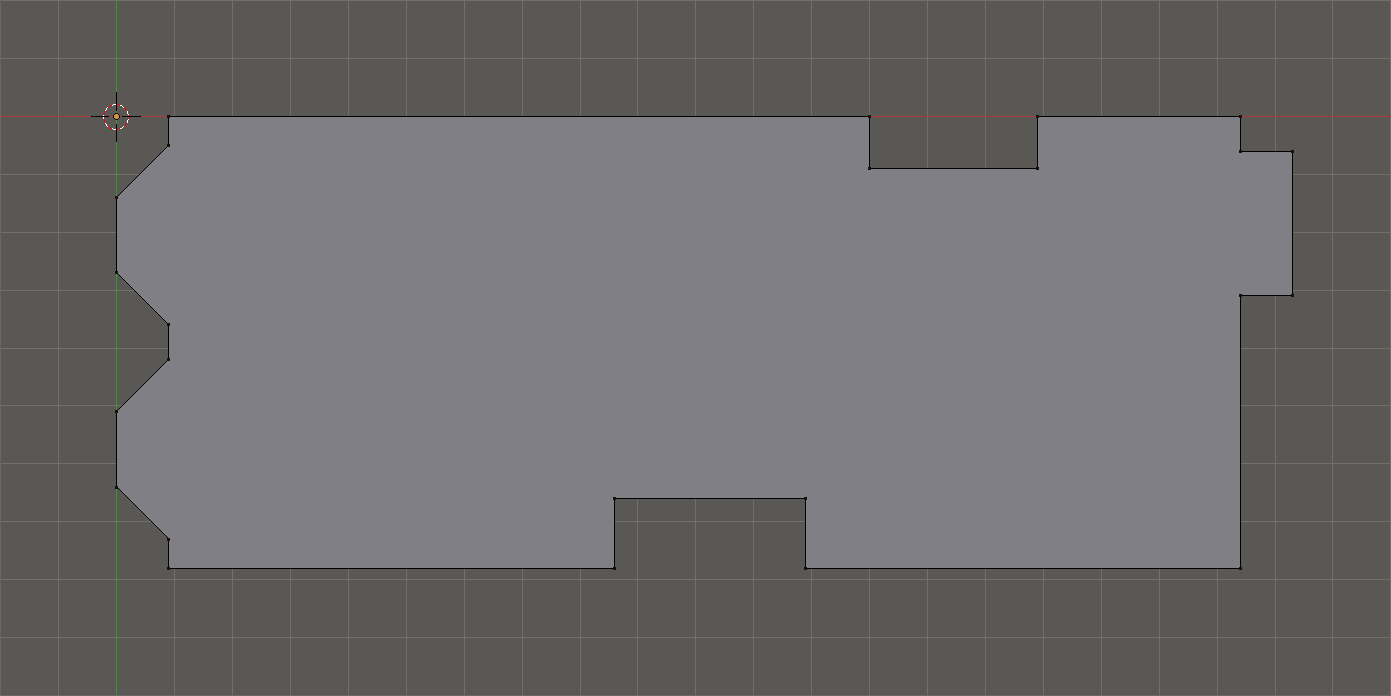
2. Calculating the height of the building
Now that you have a flat outline of the building, it needs its height of course, else it's nothing else but a building-shaped carpet.
This is the part where we start using Google StreetView. Enter it and grab a screenshot of whatever is the closest you can get to a good frontal shot of one of the sides of the building.
You may now wonder, what is a good shot?
Well, it's a shot that has little distortions and is almost flat. These are the factors:
- The closer the camera is to the building, the further you need to zoom out for it to be more or less well. Perspective distortions, fish lens, orthographic view, yadda yadda, maybe I will go into detail here some day, but not today
- The further the camera is away from the building, the more you need to zoom in, same reason as before, just the opposite direction
- The bottom of the building's wall should have the same width at the top as at the bottom, else your measurements will go apeshit (1 or 2 pixels are fine though)
- Try not to get and angled shot since the measurements you need to take need to be as straight forward as possible. You can just paste a screenshot as a texture on the fitting wall, but trust me, so far, the results I got haven't been good...
Alright, in my case, the frontal shot of the building looked like this: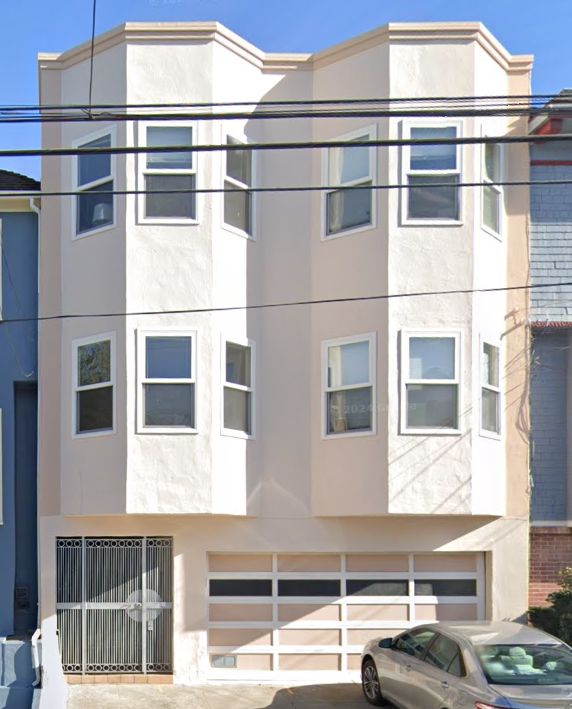
My building has a width of 7.80m (780cm), that means after pasting this image into GIMP, using the ruler tool in GIMP I was able to measure that this was equal to 489 pixels.
Now to find out, how many centimeters are hiding in one pixel, you have to use the super hard calculation formula of width of the building in centimeters divided by width of the building in pixles (cm / px).
So in my example it's 780cm / 489px = 1.595 centimeters per pixel (I rounded the result to not paste a super long number here, DO NOT USE A ROUNDED VALUE FOR THE FOLLOWING CALCULATIONS, that will yield TERRIBLE results).
Note down the calculation (780cm / 489px) on the image in case you need it again later!
Now that we have the centimeters per pixel value, we can use it to calculate the height of the building!
Use GIMP's ruler once again to get the height, in my case it's 628px, that means I have to multiply the measured height with the centimeter-per-pixel-density (628px * 1.595), yielding 1001cm, taking that rounding error in, it's 10m tall.
That means we can extrude the "building carpet" we created in the first step by 10 units along the z-axis, resulting in this: 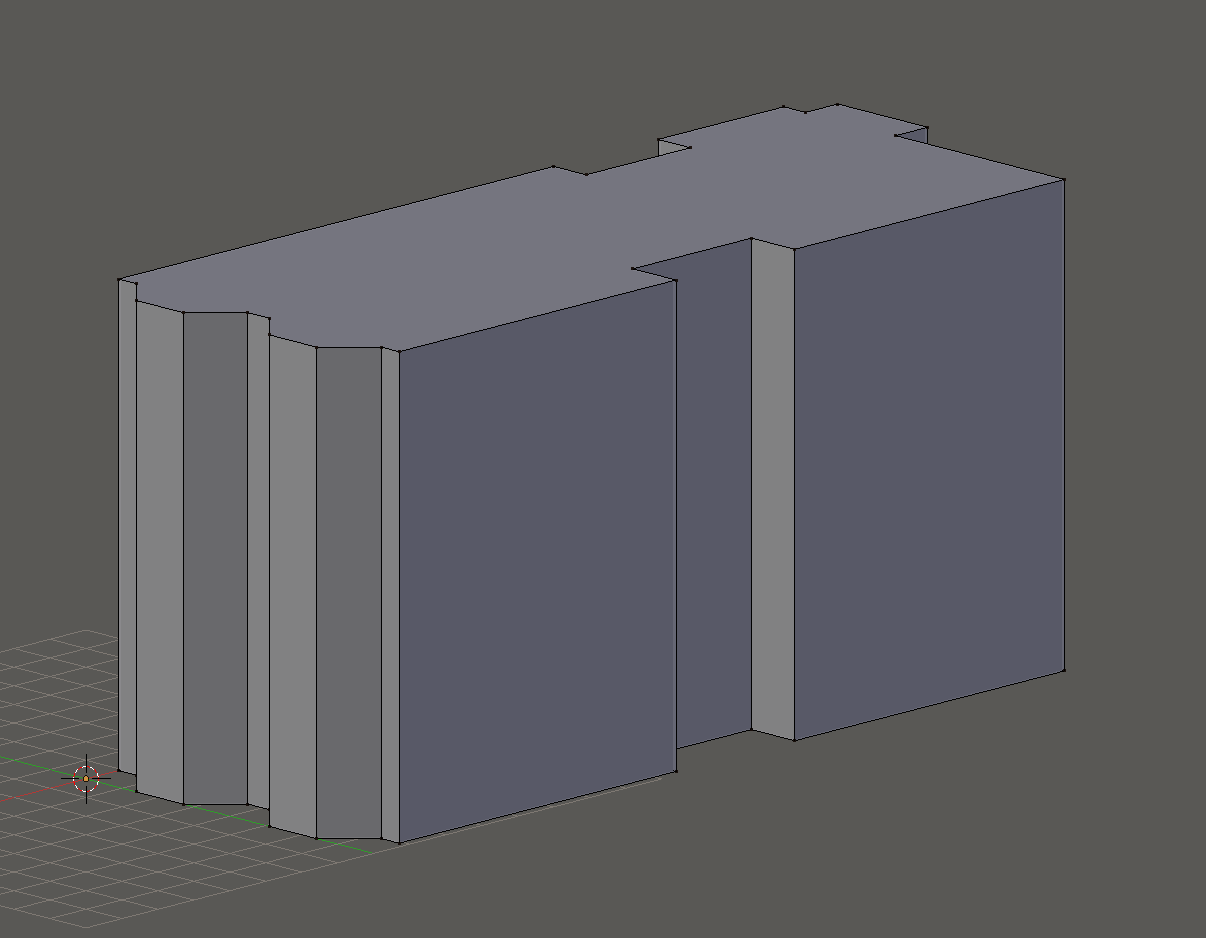
We could say that this would be enough as the last LOD model but I want to add just a few more details in the next step before calling it a day.3. Adding a few details to the building
The building is now a proper 3D shape, but it's lacking the real building's charme. In this step we are going to add details to the front, the same area that we covered before.
Of course you need to add details everywhere else as well, but just the front will be sufficient for this tutorial. ;D
Before going into detail (Haha, geddid? shoot me pls), there is one more thing I need to mention.
We can reuse the density from before, but only for things that are on the same flat plane as the measurements I took!
Everything that's closer or further away from the camera needs to be measured seperately!
To show you what I mean, I colored the parts of the image we can use with our current density in the following image: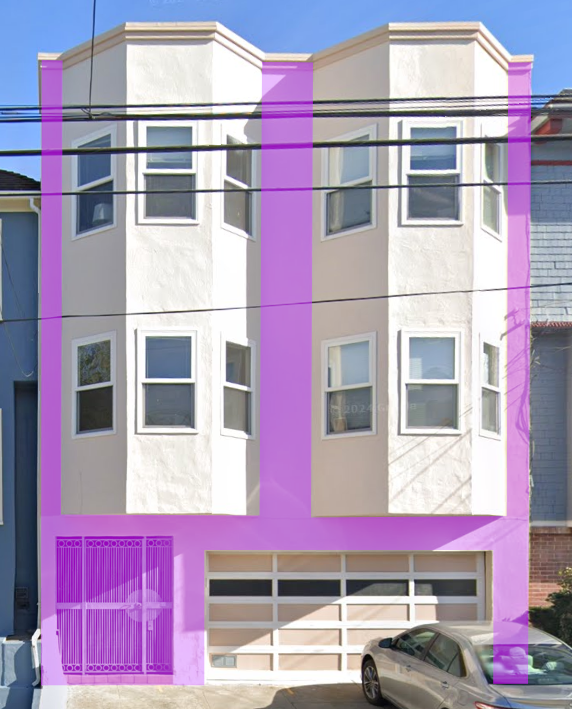
We will only be adding the "flatness" of the first floor at first, afterwards we will add the indents for the garage-door and the... well... main-door, you know?
I measured the height of the first floor to be 169px. Meaning it's 2.70m tall (169px * 1.595). I just added that to the model and this was the result:
AND PAUSE this is the perfect opportunity to create all UV-maps for the building!
Its UV-maps are now still easy to edit, before adding any more details. I won't do this (this time), but you seriously should now!
Whatever comes now should be done via the "knife-project"-tool and taking the existing UV-maps into account!
After doing this, I will now measure the doors' heights and where they are placed in the building. I will not tell you every measurement now, since srsly, so much text but this was the result: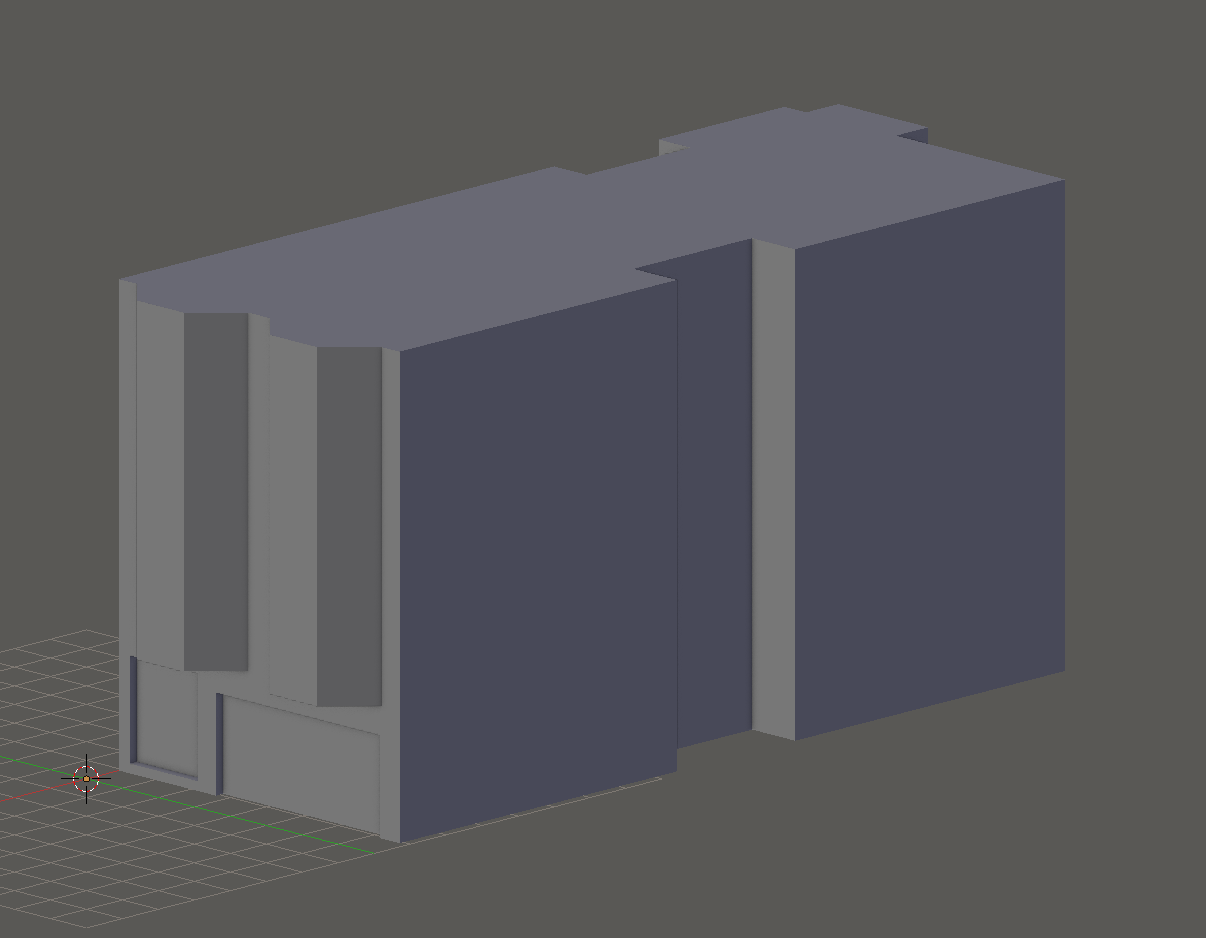
This is what I would use as the lowest detailed LOD...
That's all for the first part, in the next part I will detail it more (some day, lmao) and in the last part it's all about creating textures 'n' shit...
You can also find the "final" file of this part here...
Best wishes, brothers and sisters, you can do it!